
I love my 1967 Saab Model 96. Yes, it is homely, but it is quick and nimble, and a pleasure to drive. The only drawback has been the dismal stopping power of the tiny drum brakes up front. I’ve had my drums turned for roundness, and added new brake shoes and slave cylinder, but still the brakes leave me anxious in the event I should ever be called on for a panic stop.
That’s why about 6 months ago I acquired the disc brake spindles and axles from a Saab 95 (station wagon) of similar year. I had been told that these units are simple bolt-on replacements for the original drum brakes. I also understand that some of the later model 96’s had disc brakes which are compatible as well.
My disc brakes came from a crusty old wagon that was sitting forlornly out in a field. Fortunately the wheels were already off, and the front end was blocked up a bit, which made removal super easy.. just remove (or cut) the brake line, then remove just 3 bolts that attach the entire hub and axle to the front suspension, and pull it out.
To be sure, my donor brakes were a sad sight when first obtained. Rusty, greasy, crusty, pretty much says it all.
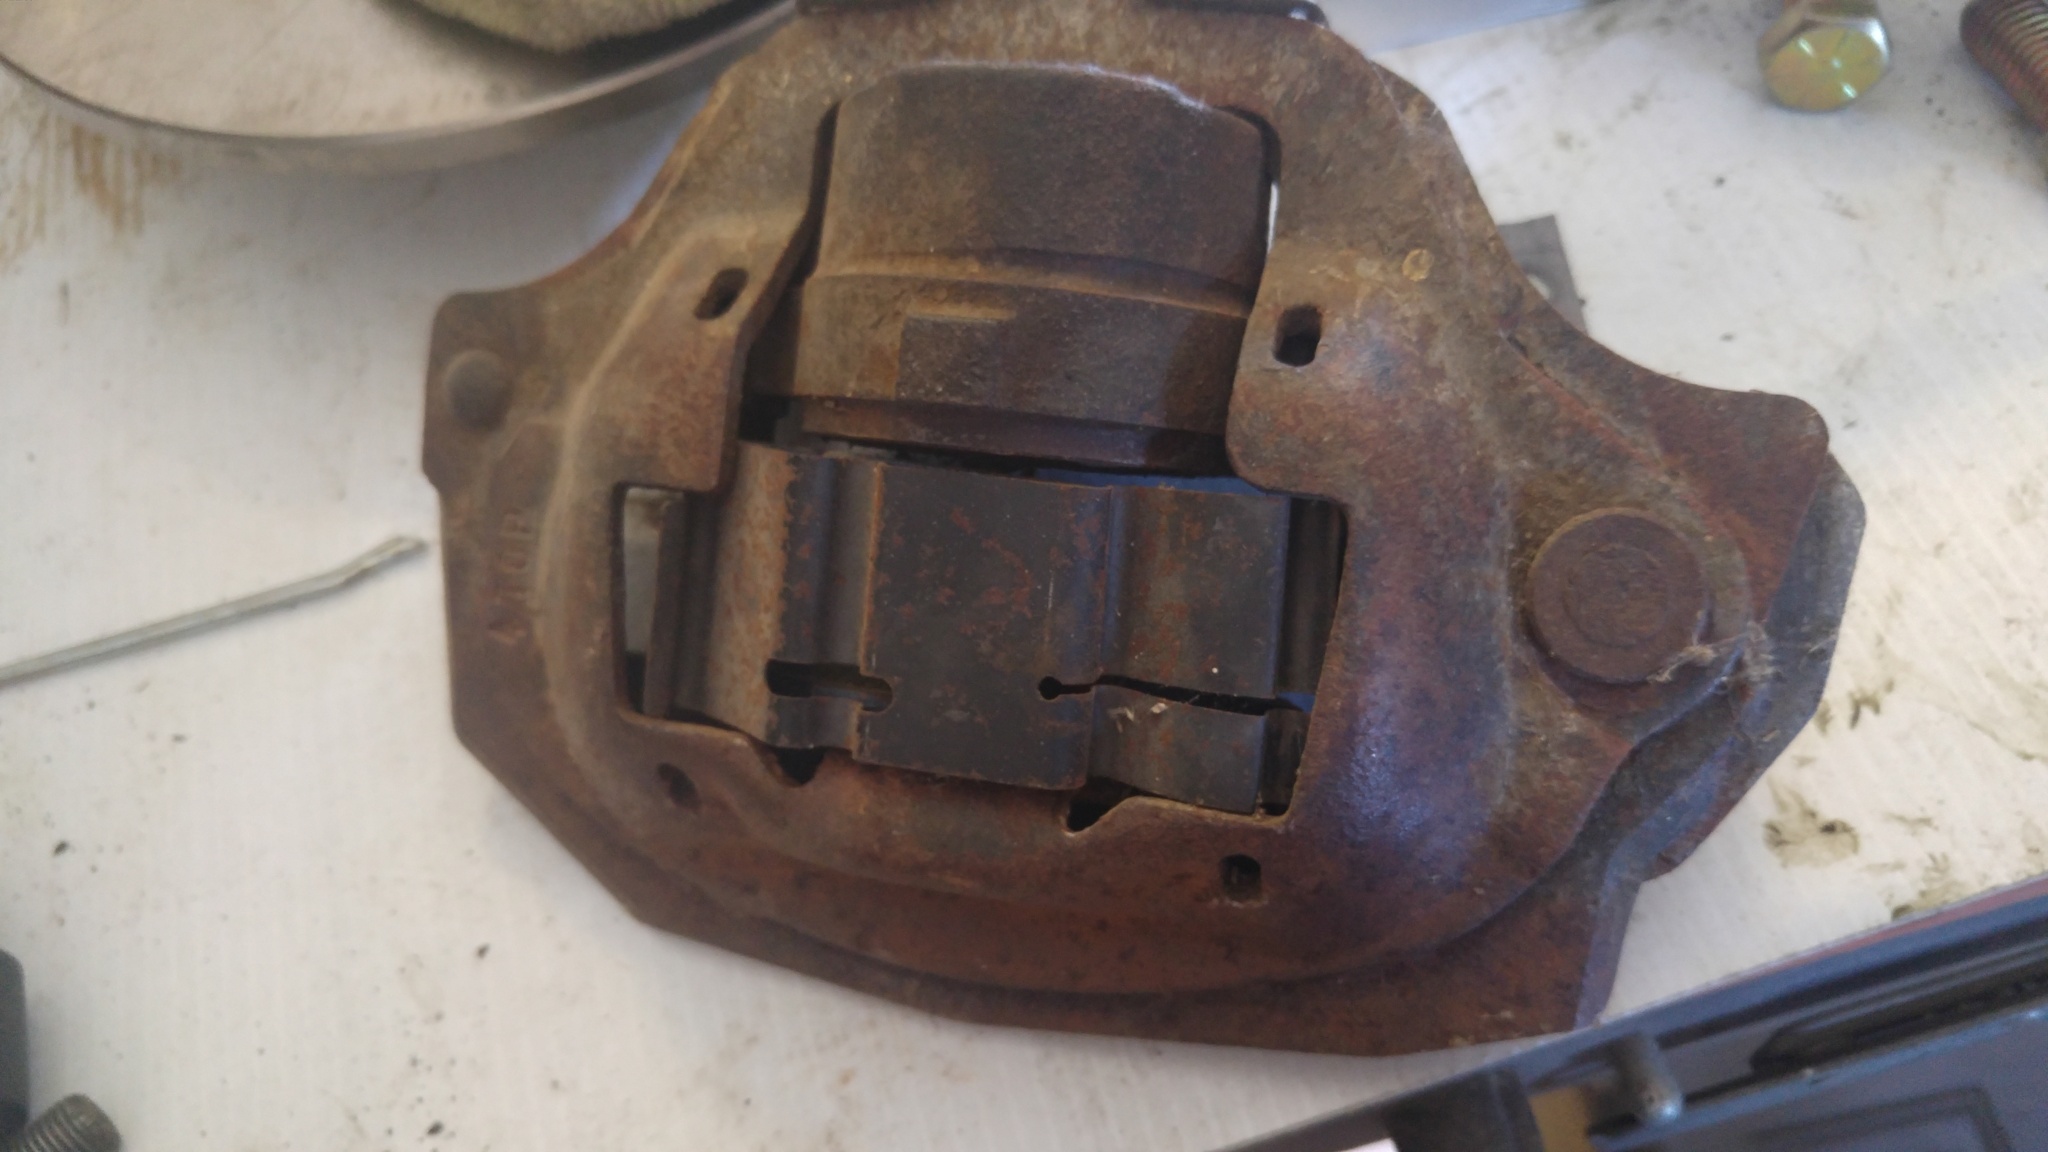

I spent the better part of 2 days cleaning these up.. disassembling, bead blasting, painting, then retrofitting with new wheel bearings, rotors, hoses, pads, and rubber gaitors for the axle. I also fabricated new locktab plates for the mounting bolts, as the originals had been closed and opened one too many times. Now they look like new!

Then my attention was diverted to other tasks, and my “new” disc setup has languished in the back storeroom for several months.
Finally, today became the day to get those discs installed on my Saab. I was truly surprised at how quickly and simply the project went (well, if you call 6 hours quick!).
The sequential steps:
- Remove both front wheels (note.. it is NOTE necessary to remove the big nut holding the axle to the drum hub.. it all comes out together)
- Disconnect the brake lines on each side, located on the engine side of the inner fender well:
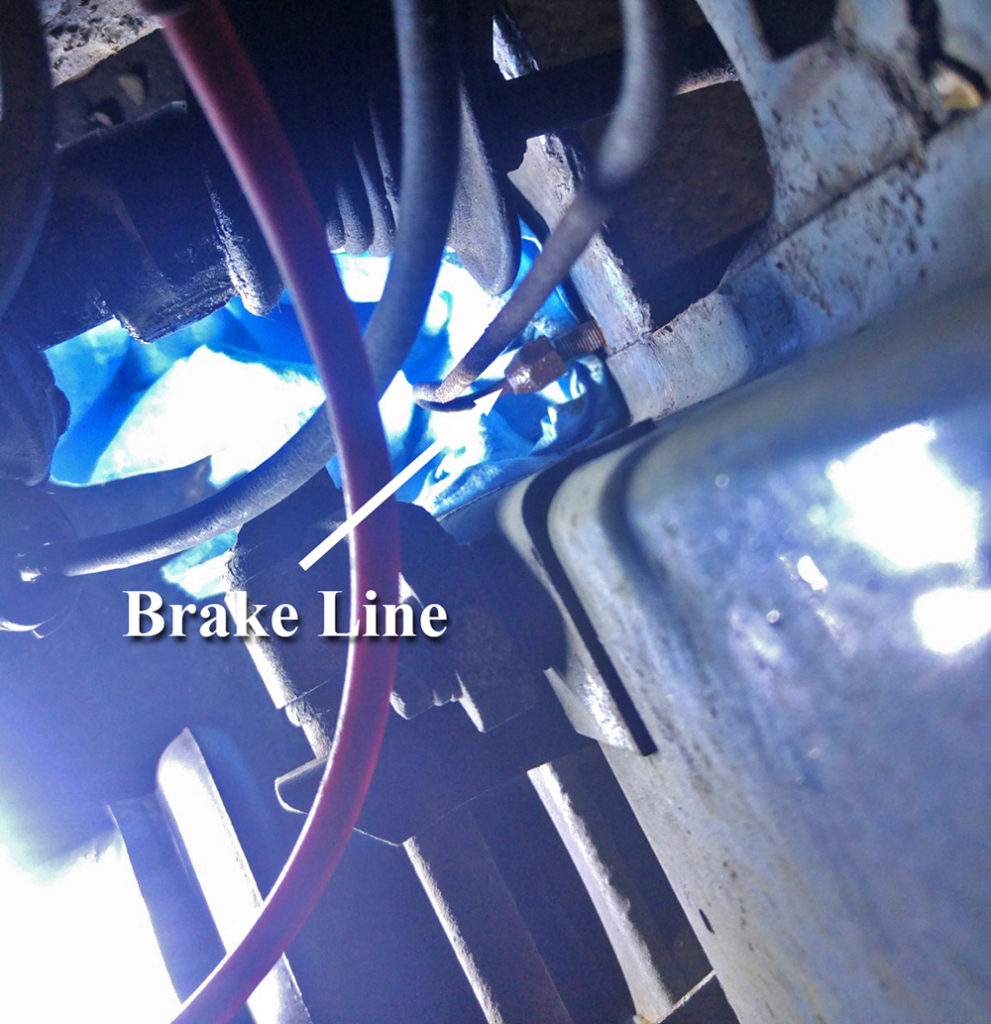
This could very well be the most difficult task in the project, as that connection is hidden way down, almost out of sight, with scarce room for a wrench (even worse access on the passenger side due to the battery tray) You may very well need an assistant to hold a wrench on the rubber line nut(in the wheel well) while you disconnect that brake line connection. - Loosen the clamp or tiewrap on the large end of the rubber gaitor around the axle at the transmission, and slide the gaitor outward a bit to be clear of the transmission
- Remove the pinch bolt from the lower arm of the hub assembly. You will need an 11/16 socket for the lock nut, and a 5/8″ socket on the bolt head on the other side:

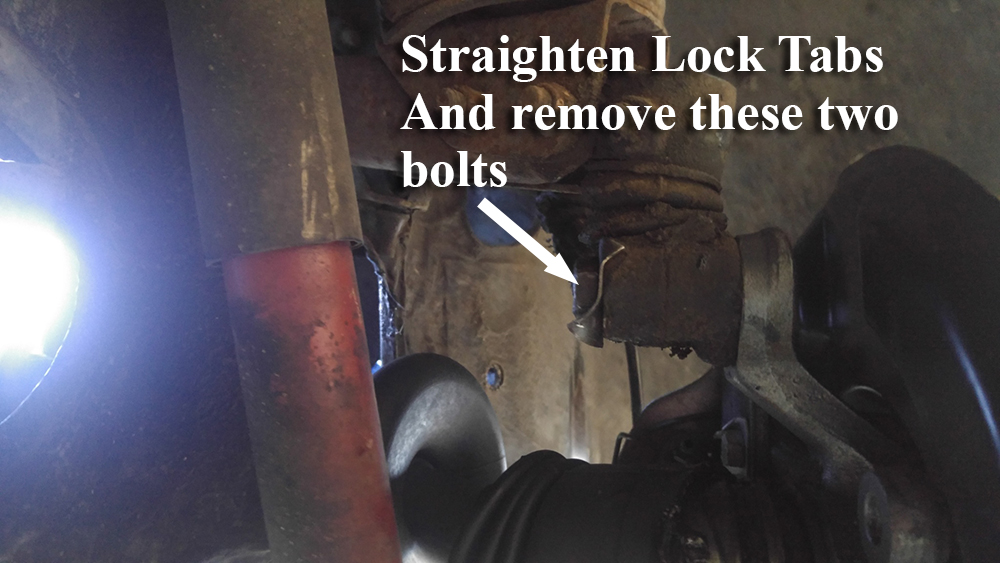
- Bend out the lock tabs then remove the two 3/4″ headed bolts that secure the upper portion of the hub assembly to the suspension. These bolts will be STUBBORN, and there is scarce room to get an impact gun in there. I used a long 3/4″ box end wrench combined with a couple of whacks with a 3 lb hammer to persuade each loose:
- At this point, the entire assembly is ready to remove from the vehicle. With some sort of support underneath the brake drum, just lift the outer assembly upward, where it will free itself from the pivot shaft the lower piece sits on. It should just come right up with little or no persuasion. Then, continue to pull the drum and the axle through the vertical access opening in the fender well until you have everything on the ground. Take note that the transmission end of the axle has a “T” shaped end, and on each leg of the “T” is a bearing cap containing needle bearings, much like a standard differential U-joint. You will need to be careful when pulling this free to insure that the cap doesn’t fall off the “T” shaft, spilling all your needles. This is a great place to employ a helper. Then, just as soon as the axle is pulled a few inches free of the transmission, have the helper clean off each end, then wrap tape from one end to the other to keep it all in place, such as can barely be seen here in the extreme right side of this photo:
- Once the old brake assembly/axle is out of the way, you can see the nature of the receptacle in the transmission that mates with the axle “T” handle:

Now is the time to give a good cleaning and remove all that old grease, then pack new grease (the special Saab stuff if you can get it) back in the opening. Before regreasing, though, inspect those slots for wear (although good luck finding replacement inner hubs!). Fortunately, mine were in good condition. - Ready to install the new disc brake assembly? Slide the inner rubber boot/gaitor OUTBOARD along the axle shaft (toward the disc brake) as far as it will go so it isn’t in the way when passing the Axle “T” through the fender well slot.
- Turn the T slot receptacle on the transmission so it is vertical as pictured above, but don’t worry too much at this point with trying to mate the axle.
- I would suggest leaving the bearing caps on the end of the axle securely taped until AFTER the next step is completed, to guard against having one of the caps fall off.
- While your helper guides the axle through the fenderwell, and with the TOP of the disc rotor canted outward, lift up the hub and set it back on its lower pivot post. With the top of the rotor tilted outward, there will still be clearance to fit the axle “T” into the transmission.
- Now move the top part of the hub assembly toward its 2-bolt mating surface, while your helper guides the axle “T” into the transmission.
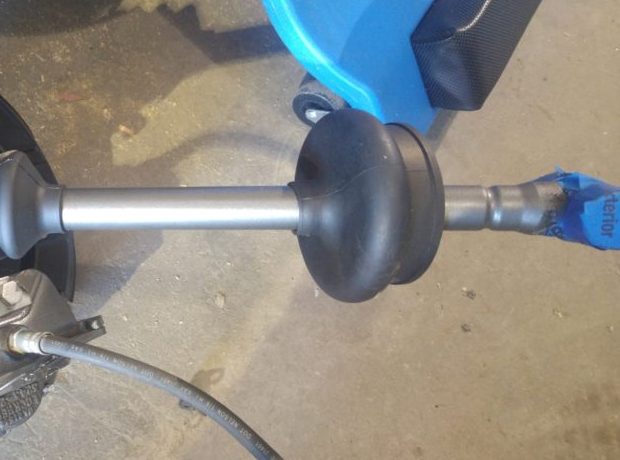
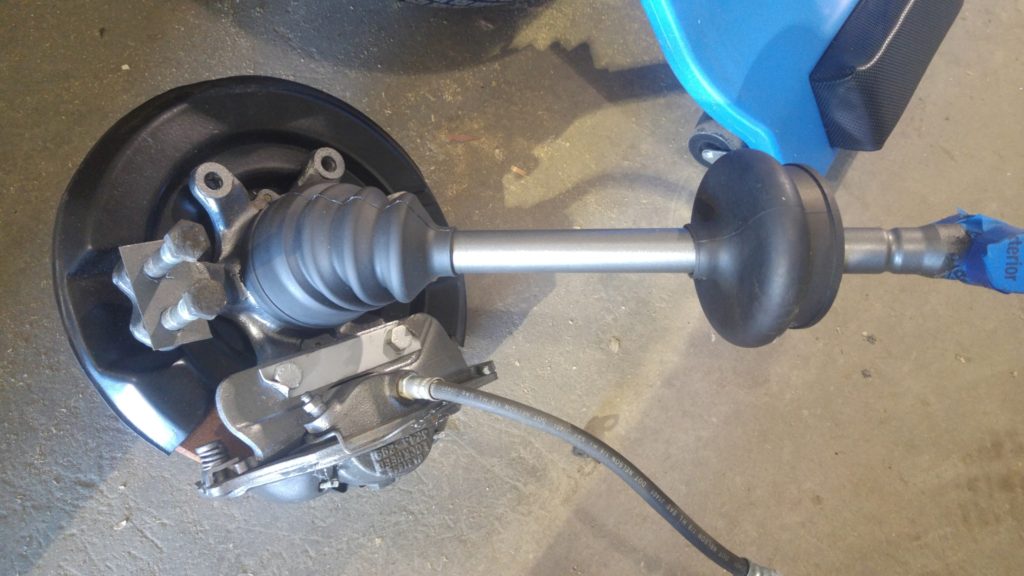
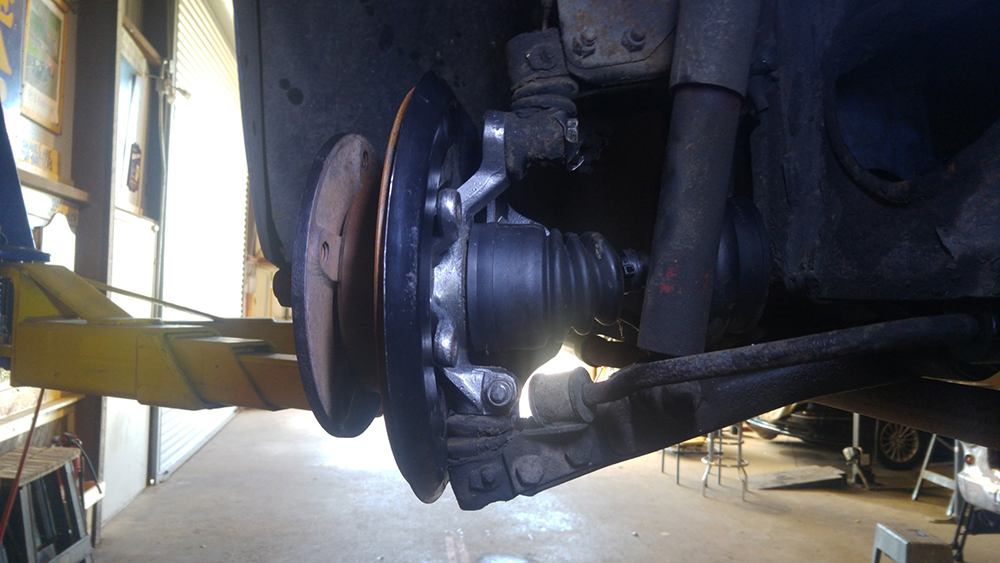
- Secure the two bolts at the top of the hub mount (don’t forget the locktab plate!), then tighten the pinch bolt/nut on the lower part of the hub cradle. Here’s what the new assembly looks like in place:
- Now you can lower the car, and reattach the brake hoses on each side, AND install a clamp or tie wrap on the rubber axle boots.
- Bleed the brakes, and you are ready for some vastly improved stopping power!